 Back in June last year (I can hardy believe it was THAT long ago) we relocated the poly tunnel, giving it a new cover and using cardboard and mushroom compost to cover the ground.
Then we got on with the house and the tunnel went on the back burner.
Here was the tunnel in autumn / winter last year. It was pretty dry in there back then .. and the rushes, grass and buttercup were already trying to get through!
 Now, the winter was very wet here and it became very messy in the tunnel - more of a mudpit than anything else. The wheelbarrow would get stuck and it was getting very silly in there.
Water even started collecting by the door.

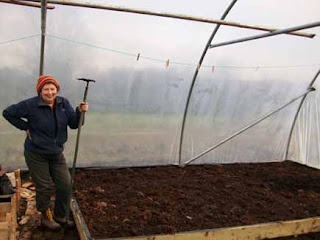
We persevered and laid out the top beds. We also added MORE compost to try to soak up the wet.

However, things weren't smooth sailing and I knew some things would have to change. We'd trenched the tunnel and the plastic covering had become slack and flappy - not good for the life of the cover .. or for the sanity of those inside.

Also, progress was really slow - and I wondered if it would get done this year at all. Luckily, after a while, I had the sense (with a little help from my friends) to realize that we needed help as well as a re-think.
So, we decided to put in base rails to anchor the cover to - in order to better re-tension it. So, on Monday, with the help of super neighbour Tommy, we bravely went forth.
First, we put a rail inside and clamped it to the bottom of the hoops.
 When we dug up the plastic the ground was really wet at the south end - but that would get sorted later.
With the base rails in, the tunnel looked better already - the cover was nice and tight again.

So, on Wednesday we moved onto phase 2 - drainage and beds. We couldn't have done it without the wonderful help of Andy and Bridget - thank you guys, you were FANTASTIC. We did in a day what would have taken me weeks to do alone.
Here's Bridget clearing the pathway for the bottom beds.
 We also cleaned out the tunnel trench and put in some land drain - so that the water falling on the cover would be tempted downhill rather than lingering around!
Our ground is clay - no need to line the bottom of the trench.
and Bridget - wouldn't stop until that bed was DONE!!
 So, today I went out to keep up the good work and momentum - lining the beds with plastic to preserve the life of the timber and adding compost to the top middle bed.
We were going to have three big beds down the bottom too - but I decided to try a different way - two big - HUGE - beds that I'll divide up and just use planks to access. We'll see how I get on with that. That design was just so easy to start with and means I can change the shapes and sizes of the beds easily.

There's still more to do - filling the rest of the beds mainly (with the big heap of rotting mushroom compost that's under the big back tarpaulin just outside the tunnel in previous picture)

There's still more to do - filling the rest of the beds mainly (with the big heap of rotting mushroom compost that's under the big back tarpaulin just outside the tunnel in previous picture)


